Reconnaissance is where engagements are won or lost before a single exploit fires. Get it right, and you walk into the active testing phase with a validated asset inventory, clear ownership boundaries, and a prioritized list of high-value targets. Get it wrong — or rush through it — and you’ll either miss an exposed attack surface entirely or spend days chasing stale, noisy leads that don’t reflect current infrastructure.
This guide lays out a structured, practical recon workflow using three tools that form the backbone of most professional assessments: Nmap, Shodan, and Maltego. Every step here is designed for authorized security assessments, internal audits, and controlled lab environments.
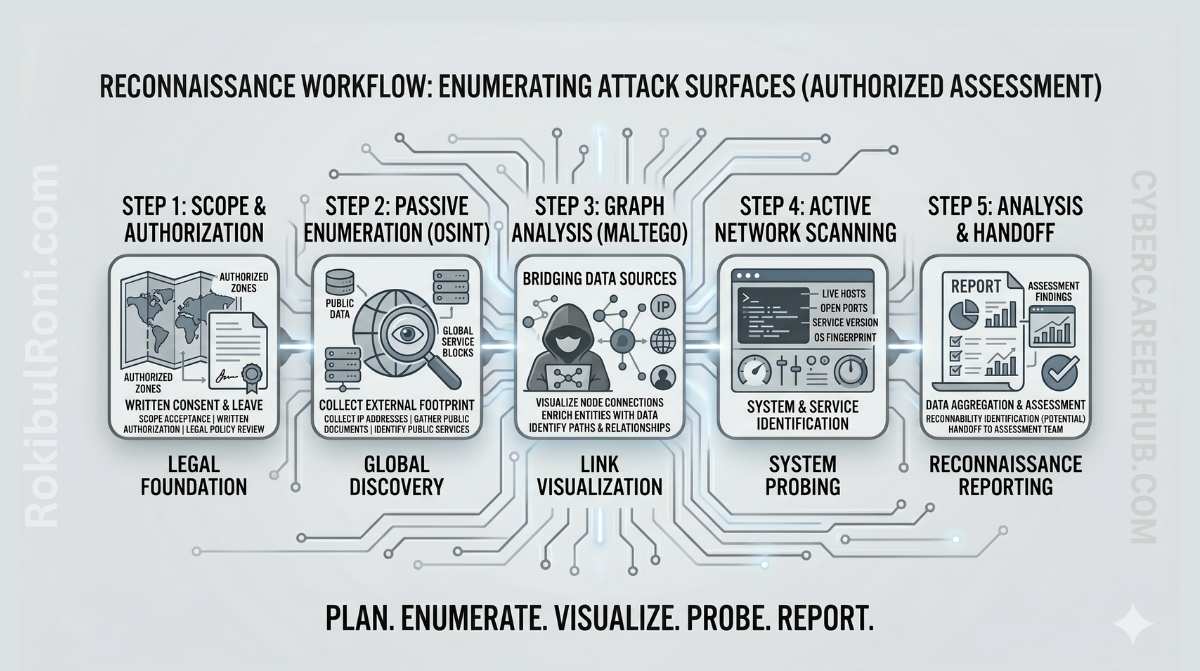
The Phased Reconnaissance Methodology
Recon works best as a phased pipeline — each stage builds on and refines the data from the previous one. Jumping straight to active scanning wastes time, creates unnecessary noise, and risks triggering alerts before you have a clear picture of what you’re actually looking at.
The Three-Tiered Recon Model
Managing operational risk during recon comes down to how clearly you’ve separated your activity by contact level. Passive work carries essentially no risk; active scanning carries real risk if it’s not properly scoped and timed.
| Phase | Core Activity | Typical Data Sources | Operational Risk | Main Objective |
|---|---|---|---|---|
| Passive Recon | Gathering public records without contacting target servers. | Certificate transparency logs, WHOIS/RDAP, public DNS, public documentation. | Very Low | Build an initial list of candidate assets. |
| Semi-Passive Enrichment | Querying third-party aggregators for cached metadata. | Shodan API, search engine indexes, passive DNS databases, historical TLS certificates. | Low | Add service context and exposure signals to candidates. |
| Authorized Active Validation | Directly probing scoped assets to verify live services and versions. | Targeted Nmap scans, HTTP header inspection, active DNS lookups. | Controlled | Confirm which candidates are live, active, and owned by the target. |
[!IMPORTANT] If your client’s rules of engagement restrict you to passive recon, stop at the end of phase two. Active validation — including Nmap scans and active DNS probes — requires explicit, written authorization. When in doubt, ask rather than assume.
Establishing Scope Boundaries & Rules of Engagement
The most dangerous recon mistakes aren’t technical failures — they’re scoping errors. Scanning an IP that turns out to belong to a shared hosting environment, a CDN provider, or a third-party SaaS vendor can create legal exposure for your client and for you, even if the intent was clearly authorized.
Before running anything, get clear boundaries in writing.
Scope Control Checklist
- Approved target domains, subdomains, and IP ranges
- Explicit exclusions (partner organizations, third-party SaaS, CDN-owned infrastructure)
- Approved active methods — service discovery, version fingerprinting, timing limits
- Authorized test windows and escalation contacts
- Data handling constraints — retention policy, redaction requirements, sharing rules
- Rules specific to cloud-hosted and multi-tenant infrastructure
- Stop conditions for instability or legal ambiguity
Rules-of-Engagement (RoE) Matrix
| Control Element | Required Clarification | Why It Protects the Engagement |
|---|---|---|
| Ownership Verification | Which domains, hosts, or network blocks actually belong to the target. | Prevents scanning unrelated entities that share IP space with the target. |
| Method Approval | What tools and techniques are permitted (e.g., port scanning yes, brute-forcing no). | Keeps testing non-disruptive and legally aligned with the engagement contract. |
| Time Boundaries | Scheduled scanning windows, usually outside business hours. | Reduces the risk of causing visible service disruptions during peak usage. |
| Escalation Path | Named contacts for technical and administrative issues. | Ensures fast coordination if scans trigger alerts or cause instability. |
| Data Governance | Rules for storing, retaining, and masking recon artifacts. | Keeps findings compliant with relevant privacy standards and regulations. |
Stage 1: Asset Intake and Source-of-Truth Setup
Recon should start with the client’s internal documentation, not automated scanner output. Scanners don’t understand business ownership or which systems are actually in scope. Starting from a structured intake document lets you verify what should exist before you go looking for what actually exists — and those two things are often quite different.
Core Intake Sources
- CMDB or service registry exports
- Known domains, brands, and business units
- Cloud account and project naming patterns
- Existing DNS zone records and delegated subzones
- Previous pentest and vulnerability reports
Building Your Working Inventory
Maintain a centralized inventory — a secure spreadsheet or a purpose-built tracker — that includes these fields for every candidate asset:
- Asset identifier (domain, hostname, IP, application name)
- Claimed owner team
- Business criticality
- Exposure type (public / internal / hybrid)
- Confidence score (starts low, increases with validation)
- Validation status (unvalidated / validated / rejected)
Stage 2: Domain and Subdomain Discovery
With root domains in hand, the goal is to build the broadest possible list of subdomain candidates from passive sources, clean the list, and resolve each entry to see what’s actually live.
The Subdomain Discovery Process
- Enumerate root domains from scope documents.
- Collect subdomain candidates from passive discovery tools and certificate transparency logs.
- Normalize the results — remove duplicates, fix typos, strip stale aliases.
- Resolve DNS and capture A, AAAA, and CNAME records.
- Flag unresolved or parked records separately for follow-up.
Practical Tooling and Command Examples
-
Subfinder (ProjectDiscovery): Fast, queries multiple passive APIs simultaneously.
subfinder -d example.com -all -silent -o subdomains.txtThe
-allflag queries every configured passive source. The-silentflag outputs clean hostnames only, which is exactly what you want for piping into other tools. -
OWASP Amass (v4): Uses a local graph database to correlate hosts, DNS names, and network blocks across enumeration runs.
amass enum -passive -d example.com -o amass_subs.txt -
crt.sh (Certificate Transparency): Every publicly trusted TLS certificate is logged here. It’s one of the richest sources of current and historical hostnames.
curl -s "https://crt.sh/?q=%25.example.com&output=json" | jq -r '.[].name_value' | sed 's/\*\.//g' | sort -u > cert_subs.txt
[!TIP] After collecting output from multiple tools, combine all files, run
sort -uto deduplicate, and load the result into your inventory tracker. Keeping everything in one place from the start saves significant time later.
Stage 3: Certificate and DNS Review
Certificate history and DNS configurations are two of the most underutilized data sources in external recon. Forgotten subdomains, misconfigured DNS records, and stale cloud resource pointers all hide here — and they often carry high-severity implications.
Certificate Audits
- SAN Entries: Subject Alternative Names group related subdomains in a single certificate. An
admin.example.comordev.example.comSAN entry on a production certificate is worth investigating. - Environment Keywords: Scan hostnames for terms like
temp,old,dev,stage,corp,backup, orlegacy. These often point to forgotten infrastructure running on outdated software. - Unexpected Certificate Authorities: A production domain using Let’s Encrypt while the rest of the enterprise uses a corporate CA can indicate shadow IT — services spun up outside the normal change management process.
DNS Records Analysis
- CNAME Redirection: A CNAME pointing to a deleted AWS S3 bucket, a decommissioned GitHub Pages site, or an inactive Heroku app may be vulnerable to subdomain takeover — where an attacker claims the external resource and starts serving content from the dangling DNS pointer.
- Parked IPs: Domains pointing to registrar placeholder pages or known parking IPs are likely stale but worth confirming.
- Split-Brain DNS: Compare internal and external resolution for the same hostname. A domain resolving to a private RFC 1918 address externally reveals internal naming conventions that are useful to an attacker.
DNS/Certificate Signal Reference Table
| Signal | Potential Meaning | Validation Action |
|---|---|---|
| Certificate includes legacy subdomains | Stale service paths that might still be active. | Resolve the hostname and check its current ownership status. |
| CNAME points to an inactive third-party platform | External resource was deleted but the DNS pointer remains. | Perform a subdomain takeover check to see if the name can be claimed. |
| Inconsistent TTL values | Configuration drift or uncoordinated manual DNS updates. | Review records with the DNS administrator to confirm intent. |
| Hostname appears in documentation but doesn’t resolve | Documentation has drifted from actual infrastructure state. | Mark as stale and confirm status with the business owner. |
Stage 4: Shodan Enrichment and Exposure Context
Shodan continuously scans the public IPv4 address space and caches service banners, open ports, and protocol metadata. Querying Shodan gives you a view of a target’s internet-facing posture without sending a single packet from your IP — which is exactly the kind of passive enrichment you want before moving to active validation.
The important caveat: Shodan data is cached. It reflects what was visible when Shodan last scanned that address, which could be days or weeks ago. Treat it as context and prioritization signal, not ground truth.
Key Enrichment Steps
- Identify likely internet-facing services tied to candidate assets
- Capture observed service banners and protocol metadata
- Prioritize which systems are most worth spending active validation time on
Practical Shodan CLI Examples
Make sure the Shodan CLI is installed and initialized with your API key before running these.
# Detailed host profile for a target IP
shodan host 198.51.100.42

# Find exposed management interfaces within a target organization
shodan search "org:'Example Corp' port:3389,22,443"
[!WARNING] Always record the timestamp of your Shodan query. If a port shows as open in Shodan but your active scan finds it closed, the service was likely patched or taken offline since Shodan last crawled it. That’s useful information — don’t discard it, document it.
Stage 5: Maltego Graphing for Infrastructure Relationships
When you’re working with dozens of subdomains, IP addresses, and cloud provider relationships, a list-based inventory quickly becomes hard to reason about. Maltego solves this by letting you map relationships between root domains, subdomains, IPs, netblocks, and autonomous systems visually.
Mapping Workflow
- Seed the graph with approved root domains and known organizations.
- Add discovered hostnames, certificate entities, and IP address relationships.
- Group nodes by business unit, environment, and service owner.
- Mark uncertain nodes for manual validation.
- Export graph snapshots with date, time, and analyst annotations.
Where Maltego really earns its place is in surfacing shadow IT — servers spun up by engineering teams outside normal security channels, bypassing standard change logs, but still linked back to the target through DNS records or shared certificates. These are the assets that live in the gap between what the client thinks is their external footprint and what actually is.
Stage 6: Technology Fingerprinting & Service Hypotheses
Before launching active scans, it’s worth spending time building explicit hypotheses about what you expect to find. Fingerprinting uses headers, cookies, error pages, and certificate metadata to infer web server software, frameworks, operating systems, and WAF presence — without active probing.
Formulating hypotheses before scanning lets you choose the right scan profiles and avoid triggering WAF blocks or service disruptions from ill-matched scan intensity.
Example Hypotheses
- Hypothesis 1: “The hostname
api.example.comlikely points to a cloud-managed API gateway with strict rate-limiting — standard service discovery scan, then manual API enumeration.” - Hypothesis 2: “The IP
198.51.100.12appears to host a legacy admin panel behind Cloudflare — passive header analysis first, then cautious targeted probing.” - Hypothesis 3: “The subdomain
dev-web.internal.example.comresolves only to RFC 1918 addresses — this is VPN-only, so schedule testing for after internal access is confirmed.”
Stage 7: Authorized Nmap Validation
Active validation is where assumptions meet reality. Here, you directly interact with scoped targets to confirm host liveness, open ports, and service versions. Because active scanning can trigger security alerts, generate log noise, and place load on systems, every scan should be deliberate, logged, and rate-controlled.
Scanning Best Practices
- Strict Scope Controls: Cross-check your target list against the approved CIDR ranges and exclusion files before every scan run.
- Conservative Rates: Limit scan speed to protect low-capacity networks and avoid triggering rate-limit blocks or intrusion detection rules.
- Detailed Scan Logs: Record the exact command, target, start time, and end time for every scan. This documentation protects you and provides a clear audit trail for the client.
Safe Nmap Command Examples
-
Fast, Non-Intrusive Discovery:
nmap -sV -Pn --top-ports 100 --max-rate 50 -oA top_100_scan 198.51.100.0/24 -
Targeted Service Banner Grabbing:
nmap -sV -sC -p 22,80,443,8080 --script=banner --max-rate 50 -oA banner_grab 198.51.100.42
Parameter breakdown:
-sV: Service and version detection.-Pn: Skip the ICMP ping sweep — assumes hosts are up, which prevents false-negatives when firewalls block ICMP.-sC: Runs default safe NSE scripts for configuration gathering.--max-rate 50: Caps outgoing traffic at 50 packets per second — low enough to stay under most rate-limit thresholds.-oA: Saves output in XML, normal, and grepable formats simultaneously, making downstream parsing much easier.
Validation Outcomes
| Validation Result | Interpretation | Next Step |
|---|---|---|
| Expected Port Open | Service is running and matches intake documentation. | Proceed to application-level security testing. |
| Unexpected Port Open | New service exposed — Telnet on port 23, Redis on 6379, or similar. | Verify ownership, flag as unexpected, and notify the client immediately. |
| Host Unreachable | Documented as active but not responding. | Flag as a potential stale asset or check for network access restrictions. |
| Uncertain Fingerprint | Nmap cannot determine the exact service or version. | Use Netcat or curl to manually inspect the response banner. |
Recon Evidence Table for Reporting
A running evidence table keeps findings organized and makes the handoff to report-writing straightforward.
| Source | Asset / Target | Confidence | Risk Signal | Recommended Action |
|---|---|---|---|---|
| CT Logs (crt.sh) | api-beta.example.com | Medium | Present in recent certificates but DNS does not resolve. | Monitor for future DNS resolution; verify owner team. |
| Subdomain Discovery | admin-backup.example.com | Low | Legacy naming suggests an unmanaged, outdated system. | Active resolution check and access control verification. |
| DNS Review | files.example.com | High | CNAME points to an external cloud platform. | Verify if the external bucket or endpoint is still active. |
| Shodan Enrichment | Scoped IP block | Medium | Banner identifies an unpatched Apache version on port 80. | Prioritize for active validation scan. |
| Maltego Graph | dev-portal.example.com | Low | Linked to an unknown external cloud provider. | Request ownership clarification from target stakeholders. |
| Nmap Validation | 198.51.100.42 | High | Port 23 (Telnet) exposed on a production server. | Log as high-severity and notify the owner immediately. |
Avoiding False Positives and Stale Recon Noise
Recon findings are only actionable if they represent real, current risk. Automated scripts produce noise — stale cached entries, parked domains, and shared IPs that don’t belong to your target. Filtering this noise is as important as finding the signal.
- Verify Current Resolution: Never report a subdomain as vulnerable without confirming it currently resolves to a live IP. A hostname that pointed somewhere dangerous six months ago might resolve to nothing today.
- Cross-Reference with CMDB: Discovered assets might be legacy servers already decommissioned from the client’s perspective. Check before flagging.
- Check Data Freshness: If a Shodan finding is months old, treat it as a lead to verify, not a confirmed exposure. Always note the query timestamp in your evidence.
- Be Careful with Shared IPs: CDN providers like Cloudflare and Akamai serve thousands of customers from shared IP ranges. Scanning a shared IP targets multiple customers simultaneously and violates scope boundaries.
Downstream Security Value
High-quality recon pays dividends across every subsequent phase of the engagement. It’s worth investing the time to do it properly.
1. Web and API Penetration Testing
- Surfaces critical API endpoints, administrative panels, and staging environments that automated scanners miss.
- Maps authentication flows and environment boundaries before active vulnerability testing begins.
- Focuses manual testing effort on high-value targets instead of dead links and placeholder pages.
2. Vulnerability Management
- Maps vulnerabilities directly to owner teams, accelerating time-to-remediation.
- Adds context — exposure level, business criticality, environment type — that helps prioritize patching schedules meaningfully.
3. Red Teaming and Threat Simulation
- Reveals the true external attack surface and perimeter trust boundaries as seen from the outside.
- Provides realistic entry points for approved adversary simulation scenarios.
- Establishes a baseline map of external exposure that defenders can use for comparison.
Common Reconnaissance Pitfalls
- Scanning outside scope because ownership was assumed rather than verified
- Treating Shodan output as definitive without active confirmation
- Ignoring cloud resource and DNS context behind a simple hostname list
- Mixing third-party assets into first-party risk statements
- Running active validation before the rules of engagement are finalized and signed
- Failing to record evidence timestamps and analyst decision notes alongside findings
Repeatable Assessment Checklist
| Phase / Task | Required Deliverable | Status |
|---|---|---|
| Scope & RoE Setup | Signed Rules of Engagement containing IP and domain limits. | ☐ |
| Asset Intake | Working inventory seeded with internal CMDB and domain data. | ☐ |
| Subdomain Discovery | Deduplicated candidate list from passive sources. | ☐ |
| DNS & Cert Audits | Documented CNAME routes, active cert domains, and environment tags. | ☐ |
| Shodan Enrichment | Host profiles with open ports and service banner data. | ☐ |
| Maltego Graphing | Visual chart of infrastructure relationships and cloud provider boundaries. | ☐ |
| Active Port Scan | Logged Nmap scan verifying liveness and service versions. | ☐ |
| Evidence Finalization | Clean, populated evidence table with confidence and risk signals. | ☐ |
| Handoff Packaging | Report-ready recon summary delivered to testing and remediation teams. | ☐ |
Recon Governance & Program Worksheet
| Workstream | Responsible Owner | Primary Action | Target Metric |
|---|---|---|---|
| Scope Compliance | Engagement Lead | Verify target ownership before any active discovery runs. | Zero out-of-scope scanning incidents. |
| Inventory Integrity | Security Operations | Merge discovery candidates with internal registries. | Reduce the percentage of unowned active assets. |
| Data Hygiene | Recon Analyst | Timestamp all external data and record source details. | 100% of findings contain source and recency tags. |
| Scan Safety | Technical Lead | Monitor and throttle active scan rates. | Zero operational downtime or latency spikes from scanning. |
| Reporting Handoff | Security Manager | Deliver clean, parsed tables to downstream testing teams. | Handoff package accepted without rework. |
Evidence Handoff Package Standards
A high-quality recon handoff package should include:
- Asset inventory: Hostname or IP, environment estimate (prod/stage/dev), owner, confidence level, recency.
- Exposure summary: What is externally reachable, why it matters, and what remains unverified.
- Validation log: When and where active checks ran, the scope reference used, and the result.
- Open questions list: Ambiguous ownership, suspected third-party assets, and items requiring confirmation.
Confidence Labeling Standards
- High: Verified by two independent passive sources and confirmed via scoped active probe.
- Medium: Discovered via two independent sources, but active verification has not been performed.
- Low: Single passive source or stale/cached dataset. Must be marked “Unverified.”
Recency Requirements
- External Caches (Shodan): Mark as “Historical” unless queried within 48 hours of handoff.
- DNS Records: Record the exact lookup timestamp and the resolver IP used.
- High-Risk Claims: Any service flagged as a critical exposure must be actively validated within 24 hours of report generation.
90-Day Recon Capability Maturity Plan
Days 1–30: Foundation
- Establish standard templates for inventories and evidence tables.
- Conduct a baseline recon cycle across primary corporate domain sets.
- Document and categorize the most common false-positive sources in your environment.
Days 31–60: Integration
- Build automated DNS checks to flag stale CNAMEs on a weekly cadence.
- Integrate recon outputs into the standard pentest planning pipeline.
- Begin tracking asset ownership identification times as a metric.
Days 61–90: Optimization
- Set up recurring, scheduled recon aligned with deployment schedules — new code often introduces new external endpoints.
- Publish recon KPIs and perimeter growth metrics to security leadership.
- Refine handoff validation rules so downstream teams consistently receive clean, actionable data.
Core Metrics to Track
| Metric | What It Measures | Target Direction |
|---|---|---|
| Ownership Rate | Percentage of public assets mapped to an internal owner team. | Up |
| False-Positive Rate | Percentage of reported exposures that turn out to be stale or inactive. | Down |
| Time-to-Validate | Average time to actively verify a newly discovered subdomain. | Down |
| Recon Reuse Rate | Percentage of recon findings used by pentest teams to execute exploits. | Up |
A disciplined recon process turns discovery from an ad-hoc, chaotic exercise into a repeatable, high-value intelligence operation. The investment compounds — each engagement leaves you with better templates, more refined tooling, and a clearer picture of what good recon output actually looks like.
